感谢群里天地大佬
PVE安装好以后还有很多优化过程,重新调分区、换源、升级内核、直通硬件、显示温度等,先记录一下:
重新调整分区
先进入SSH,运行以下两个命令:
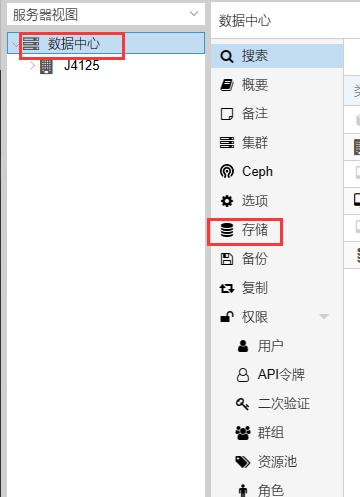
lvremove pve/datalvextend -l +100%FREE -r pve/root执行完成后,按下图进入存储
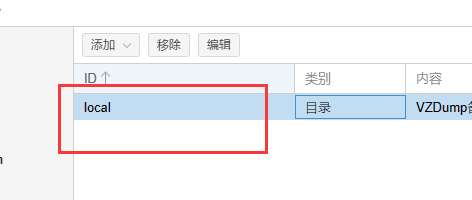
将右边里面lvm的全部删掉,然后双击“local”
将以下内容全部选中再保存
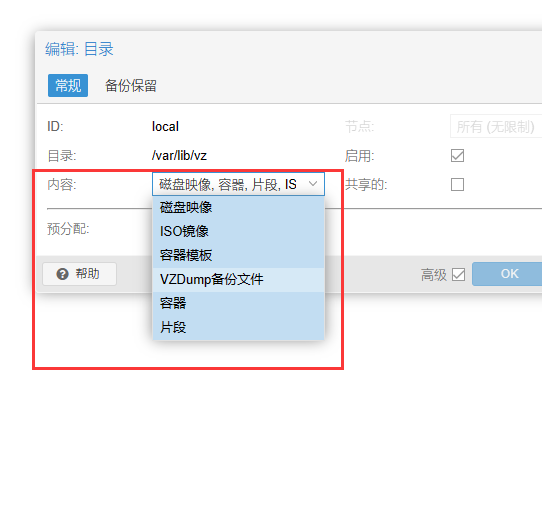
这样分区调整就搞定了
换源
nano /etc/apt/sources.list打开以后,内容全删掉,粘入以下内容后保存:
deb https://mirrors.tuna.tsinghua.edu.cn/debian/ bullseye main contrib non-free
deb https://mirrors.tuna.tsinghua.edu.cn/debian/ bullseye-updates main contrib non-free
deb https://mirrors.tuna.tsinghua.edu.cn/debian/ bullseye-backports main contrib non-free
deb https://mirrors.tuna.tsinghua.edu.cn/debian-security bullseye-security main contrib non-free
nano /etc/apt/sources.list.d/pve-enterprise.list打开以后,内容全删掉,粘入以下内容后保存:
deb https://mirrors.tuna.tsinghua.edu.cn/proxmox/debian bullseye pve-no-subscription换完之后,输入以下内容,升级一下系统:
apt update && apt dist-upgrade -y再把lxc的源也换下:
sed -i 's|http://download.proxmox.com|https://mirrors.tuna.tsinghua.edu.cn/proxmox|g' /usr/share/perl5/PVE/APLInfo.pmsystemctl restart pvedaemon.service至此,换源结束了
升级内核
可以先查询下内核情况
apt search pve-kernel|grep pve-kernel-也可以直接输以下内容升级
apt install -y pve-kernel-6.2.11-2-pve pve-headers-6.2.11-2-pve pve-firmware重启之后,内核就升级完成啦
硬件直通
先输入以下内容打开文件
nano /etc/default/grub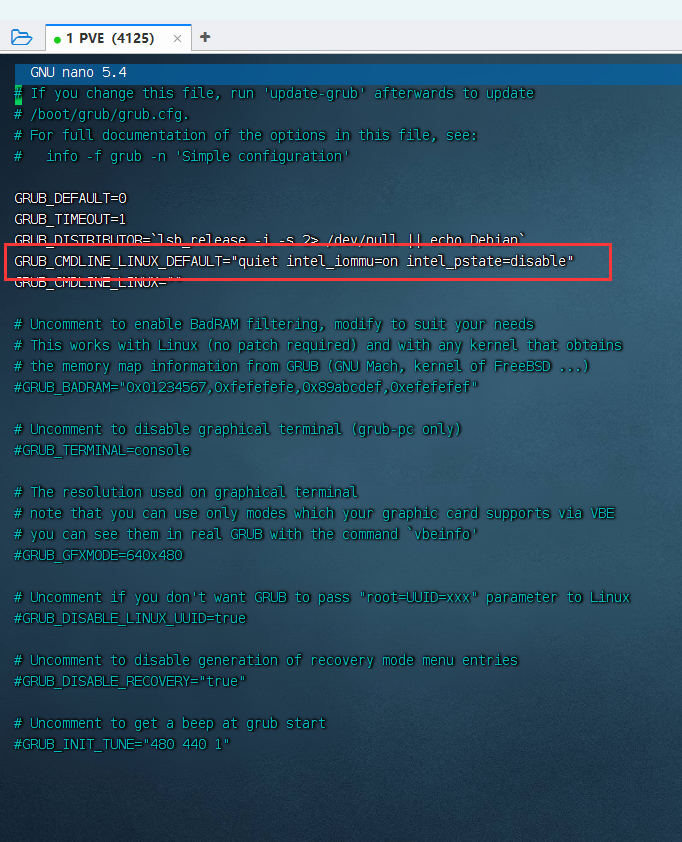
将上图里的内容改为以下内容后保存
GRUB_CMDLINE_LINUX_DEFAULT="quiet intel_iommu=on intel_pstate=disable"然后将以下内容添加进 /etc/modules,如图

vfio
vfio_iommu_type1
vfio_pci
vfio_virqfd
nano /etc/modules然后输入以下两个命令后重启,硬件直通就完成了
update-grubupdate-initramfs -u -k all其它优化
显示温度
将以下文件传至 /usr/share/perl5/PVE/API2
将以下文件传至 /usr/share/pve-manager/js
然后执行下面命令
apt-get install lm-sensors && apt-get install nvme-cli && apt-get install hddtemp && chmod +s /usr/sbin/nvme && chmod +s /usr/sbin/hddtemp && chmod +s /usr/sbin/smartctl && systemctl restart pveproxy去掉每次登陆都提示订阅
sed -Ezi.bak "s/(Ext.Msg.show\(\{\s+title: gettext\('No valid sub)/void\(\{ \/\/\1/g" /usr/share/javascript/proxmox-widget-toolkit/proxmoxlib.js && systemctl restart pveproxy.service配置省电
apt-get install cpufrequtilsnano /etc/init.d/cpufrequtils改成以下这样
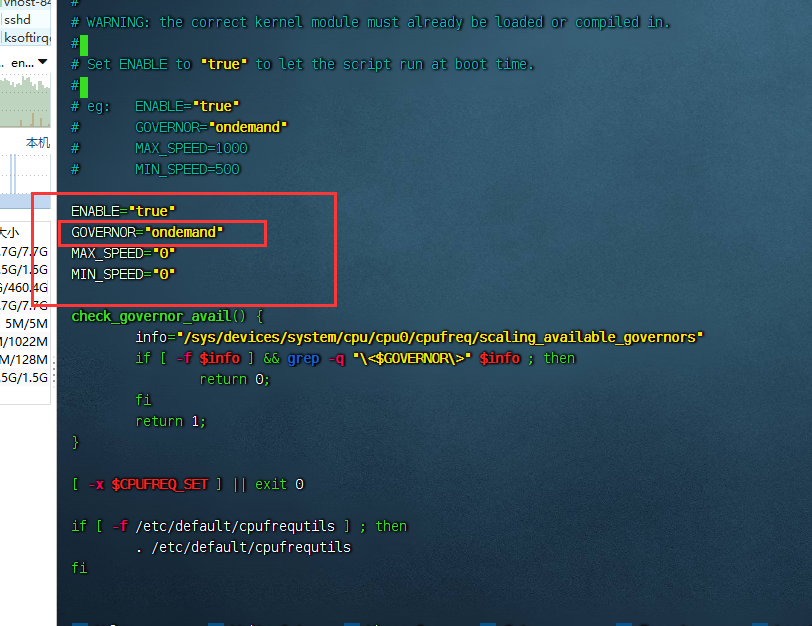
然后继续执行以下内容
cat << 'EOF' > /etc/default/cpufrequtils
GOVERNOR="ondemand"
EOF
systemctl daemon-reload/etc/init.d/cpufrequtils restart省电也配置好了。。。基本上没了。。可以用了